Showing posts with label recipes. Show all posts

Tuesday, February 25, 2014

-the Italian wONEderpot-

Today, I bring to you a stockpot full of amazingness:

adapted from this recipe.
It is wonderfully, deliciously spicy and makes the perfect one-pot meal {hence the name}.

Let's get started, shall we?


Ingredients:
- one 19oz package (or 5 links) of HOT Italian sausage
- one medium yellow onion, thinly sliced
- White wine, a generous drizzle - I used about 1/4 cup
- one 10oz. package of frozen spinach
- 4 cups of vegetable broth, +2 cups of water
- one 28oz. can of diced tomatoes, not drained
- 16oz. of fettuccine noodles
- 4 cloves of garlic, minced
- 1/2 Tbsp of dried basil
- 1/2 Tbsp of dried oregano
- 1/4 tsp of red pepper flakes
- freshly cracked black pepper, to taste
- Olive oil

What you'll need:
One large stockpot.

How to:
- Throw the stockpot on the stove and get it heated up (set burner to med-high)
- Add 1 Tbsp of olive oil to the stockpot.
- Remove casings from the sausage & crumble into the hot pot. I literally just cut an opening on one end of the sausage and squeezed out the meat in chunks from the casing. Sounds weird, but it works!
- Allow sausage to brown just a bit, and then add in the sliced onion.
- Cook until the sausage is completely browned/cooked and the onion is tender/translucent.
- Drizzle in some of the white wine & allow to cook down. This will deglaze the pot, aka get up all of those yummy bits of sausage/onion juice/morsels that are stuck on the bottom. *use of wine is optional*
- Throw in the block of frozen spinach & as it thaws, pull apart and stir into the rest of the mixture until it thaws completely.
- Stir in the vegetable broth with the water, tomatoes, fettuccine (broken in half), basil, oregano, garlic, red pepper flakes, another splash of the white wine, and black pepper.
- Cover the mixture to bring it to a rolling boil.
- Turn the heat down to medium (keep at a boil), uncover, & cook 10-15 minutes or until most of the liquid has evaporated & the pasta is tender/cooked.
- You're done! That's it!
- Bask in the glory of the one pot meal that you just created and the pile of dishes/pots/pans that you did not.
- Enjoy!

We topped ours with fresh basil leaves and some shredded Parmesan cheese. We also soaked up all of the juicy goodness at the bottom of the bowl with some garlic bread. Also, also: we had leftovers for daysss. But, in reality, this probably makes about 6-8 adult, dinner-sized portions.

There you have it!
So easy. So tasty. So worth giving it a shot.
You're welcome. ;)


xo,
Sara

Friday, September 20, 2013

Handheld Fried Chicken Pot Pies

I've made these babies twice now - and both times they were devoured within minutes. {Meaning: We literally ate them right as they came out of the deep fryer.} #dontjudge. I mean, the recipe stems from a Paula Deen/Rodney Henry recipe collaboration {Anyone else watch Food Network Star?!}... So, how can it not be delicious!?

First things first, gather your ingredients:
- 3 boneless, skinless chicken breasts
- 2 cans of Buttermilk Biscuits (Jumbo - 8 biscuits/can) *this means that this makes 16 pies! you can obviously cut all of the other ingredients in half and only use 1 can of the biscuits to make just 8 pies.
- 1/2 of a 25 oz bag of frozen mixed veggies from Jolly Green Giant
- 1 12 oz jar of Heinz Classic Chicken Gravy
- Seasoning of choice (for the chicken)
- Salt & Pepper (to taste)
- Olive Oil (just a drizzle)
- 2 qts of 100% Vegetable Oil (If using a deep fryer like we did. Only pour about 2 inches of oil if using a heavy bottomed pot instead.) 
* A deep fryer or a heavy-bottomed pan/pot is obviously necessary.
** You can get really fancy and omit the ingredients listed in green if you want to make Rodney's Savory Chicken Pie Filling instead. However, I am lazy and the frozen veggie mixture worked out just fine for me!
Step 1: Add your vegetable oil to your cooking device (pot or fryer) and heat to 350*F.
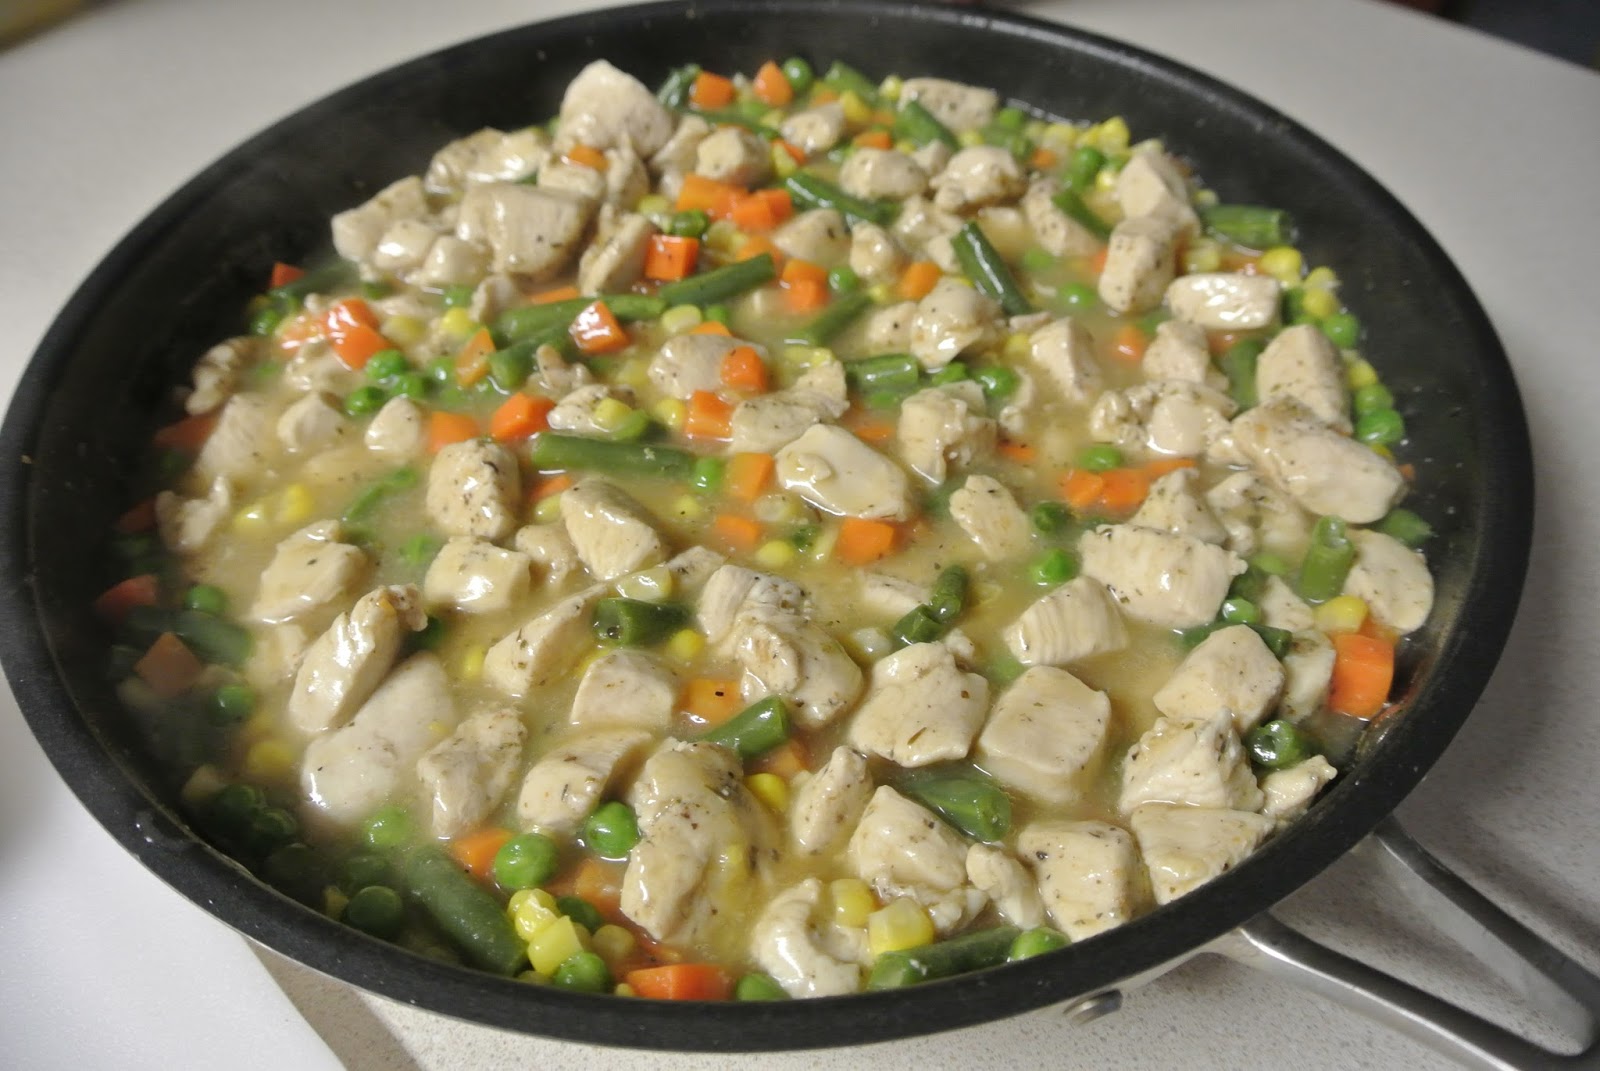
Step 2: Cut up your chicken breasts into bite size cubes. Season with the drizzle of olive oil and your seasoning of choice. Cook them all of the way through in a large skillet.
Step 3: After the chicken is cooked, add the mixed veggies and cook those up as well!

Step 4: Add the chicken gravy! Then let cool slightly.


 Step 5: Roll out your biscuits so that they are big enough to put about a scoopful of the filling in the middle. Just guest-i-mate, maybe about as big as your hand. I'm not too technical when it comes to this, haha. Then wet the edges of your dough with some water (to help the dough stick together when frying).


Step 6: Scoop the mixture onto the rolled-out biscuit and then fold over the one side of the dough and crimp the edges with a fork. Again, it doesn't have to be super perfect.


Step 7: Fry that sucker! Ours was good at about 3:30 minutes on each side. It made for a nice golden-brown and crispy crust.


Step 8: Let they pies de-grease a little by sitting them on some folded over paper towels... and try to resist not eating them right away...


Step 9: Fail miserably at the whole "don't eat it until the others are done" thing.


Step 10: Make a mountain of Fried Chicken Pot Pie deliciousness.


Enjoy!


Tuesday, July 2, 2013

sausage & hashbrown casserole

 
{This recipe is courtesy of Erin.}
I found this recipe while reading Erin's blog and thought: this is AH-MAY-ZING! Ironically enough, just a few days after she posted it, le boyfriend came home and said that he needed something to take to a "breakfast potluck" at work the next day. Well, insert happy-Sara-face here, because I immediately knew what to make!
 
Badda Bing, Badda Boom, I give you {well, technically Erin gives you} some delicious casserole goodness!
 
*Sidenote: I was going to label this "Erin's sausage & hashbrown casserole" but something about "Erin's sausage" just didn't sound right. Especially since Erin is a girl. And we're talking about food here. Okay, moving on...


First, gather all of your ingredients:
  1. 30 oz bag of hashbrowns - her recipe says to use country style ones {the chunkier kind}, but I prefer the shredded ones. Po-TAY-to/pa-TAH-to... literally.
  2. 1 can of Cream of Chicken Soup
  3. 1 can of French Onion Soup
  4. 2 cups of shredded cheese, your choice!
  5. 1/2 cup of red pepper and 1/2 cup of green pepper
  6. 1 cup of sour cream
  7. 1 cup of onion
  8. 2 pounds of ground sausage - I used 1 pound of hot and 1 pound of mild
  9. Not pictured: salt and pepper to taste


Directions:
  1. Chop up all of your veggies!
  2. Combine and brown the sausage
  3. Mix all other ingredients in seperate bowl
  4. Once sausage is browned, add to the mixture
  5. Spoon into a 13x9 baking dish/casserole dish {and a miniture ramekin for yourself since your boyfriend will be whisking said casserole off to work the next morning and you just have to try some right when it pops out of the oven!} and bake for 45-60 minutes at 350* -I baked mine for about 50 minutes
  6. ENJOY!

*Be warned: This makes a TON of servings. I couldn't even tell you how many, but I can say that about 1/4 of it is still sitting in our fridge {even after he took it to the potluck!}. I'm sure you could probably cut all of the ingredients in half to make a smaller casserole and it would still be delish!


That's all, folks!


Thursday, May 30, 2013

SPD: BLT DIP

Original pin found here.
I made this dip for a Memorial Day party this weekend and it was a HUGE hit! So tasty and so easy to make. Let's get started shall we?

Alright, so, first things first, gather up all of your Ingredients! That includes:
  • 1 pound bacon - cooked, drained, and crumbled. {I used two 6 oz. pkgs of crispy turkey bacon; who says you can't get healthy-ish with this, right? Right.}
  • 2 {8 oz.} packages of cream cheese, softened. {Again, I used light cream cheese to kinda cut back on the fat.}
  • 2 cups shredded mozzarella cheese.
  • 2 cups shredded Fontina cheese. {I ended up just using 4 cups of mozzarella cheese because I had no idea where to find Fontina cheese.}
  • 1/2 cup light sour cream.
  • 1/2 cup mayonnaise. {or miracle whip or greek yogurt, whatever your healthy -or unhealthy- heart desires.}
  • 1/2 teaspoon of Italian seasoning.
  • 1 teaspoon of garlic powder.
  • 2 tablespoons of Dijon mustard.
  • salt & pepper to taste.
  • 1 1/2 cups of chopped, seeded tomatoes.
  • 1 cup shredded Iceberg lettuce.
  • Your choice of dippers: Toasted bread rounds, crackers, or pita chips. {I used Green Giant Sweet Potato Chips with Sea Salt. YUM!}

Then follow the directions:
  • (1) Cook your bacon. This process could even be done the night before or sometime in advance, because it really is time consuming.
  • (2) Recruit back-up to help chop your lettuce and tomatoes while you cook the bacon.
  • (3) Realize you forgot to add 3 ingredients to your picture of all of the ingredients for this recipe.
  • Not pictured: Preheat oven to 350* and spray a 1 1/2 quart baking dish with nonstick cooking spray.
  • Also not pictured: Set aside 1/2 cup of crumbled bacon.
  • (4) In a large bowl, combine remaining bacon, cream cheese, shredded cheeses, sour cream, mayonnaise, Italian seasoning, garlic powder, salt, pepper, and Dijon mustard.
  • (5) Stir it all up!
  • (6) Spoon into baking dish.
  • Bake for 25 to 30 minutes or until hot and bubbly.
  • Sprinkle chopped tomatoes, remaining 1/2 cup of crumbled bacon, and Iceberg lettuce over hot dip.
  • Serve immediately with your choice of dipping vessels.
  • Enjoy the best dip EVER. Seriously, the whole thing was gone between the Memorial Day party and taking leftovers to my parent's house for dinner that evening. So good.


Linking up today with Stephanie and Katie for Saw It, Pinned It, Did It!


Thursday, May 23, 2013

SPD: Crispy Ranch Chicken & Baked Asparagus

 
Monday night, I made this delicious Crispy Ranch Chicken via this pin
and my favorite and super simple way to make asparagus via this pin.
 
 
To make the chicken:
{sidenote: I tweaked the recipe from the original pin a wee bit!}
 
1. Gather all of your ingredients
- about 8 chicken tenderloins {or about 5-6 chicken breasts}
- 1 cup of Ranch dressing {I ended up doing about 2/3 cup of Ranch and 1/3 cup of Greek yogurt to try to cut down on all of that Ranch-y texture. Next time, I will likely make it with just Greek yogurt and a packet of Ranch dressing mix.}
- 1.5 cups plain bread crumbs
- 1.5 cups lightly crushed corn flakes
 
2. Set up an assembly line!
- in a wide bowl, pour in ranch dressing
- in a second wide bowl, combine bread crumbs and corn flakes
 
3. Procede with coating the chicken
- dip chicken evenly into ranch on both sides
- dip ranch covered chicken into dry mixture
- place on top of wire rack on baking sheet {this helps to get the chicken crispy on ALL sides!}
 
4. Bake at 350* for 35-45 mins
OR until chicken is tender and cooked through.
 
 
Now, to make the asparagus:
 
 {Two quick words: YUM. YUM.}
 
It's really rather simple.
Take the fresh/raw asparagus and season with:
-olive oil
-pepper
-salt
-a sprinkling of parmesan cheese
-and {this time} I added toasted sunflower seeds.
 
Lay flat on a baking sheet.
 
Bake at 400* for about 8 minutes.
 
That's it!
Easy as asparagus pie, right?
You're welcome.
 
 
You can add whatever other side dishes you enjoy.
We chose some nice chunky applesauce {because we're still kids at heart, obviously}.
 
Enjoy!
 
One more sidenote:
Doesn't it just kill you when you have a sink full of dirty dishes,
and you go to put them in the dishwasher...
only to find a dishwasher packed full of clean dishes that you have yet to put away?
Gah.
 Luckily, I got it all taken care of quickly while the food was in the oven.
{& just in time to have to clean up all of the dirty dishes from the rest of dinner.}
Moral of story: I do not like doing dishes.
#endrant.
 
Linking up today with Stephanie {Katie's off vacationing!}, of course.


Thursday, April 11, 2013

Carrot Cake Poke Cake {SPD}


I made this cake for Easter this year. Let me tell you, it was SO good!
{#pinterestdoesitagain}

I actually forgot until about 10pm on Saturday night that I was supposed to make this baby and let it sit overnight. Oops.
So, I ended up staying awake wayyy past my bedtime to create this masterpiece...
but oooh boy was it worth it!


Isn't she a beaut?!
Original recipe found here.
 
Ingredients:

  • The 9x13 Carrot Cake recipe of your choice, baked and cooled {I used a box mix}
  • 14 oz sweetened condensed milk
  • 8 oz Cool Whip
  • 10.6 oz Cool Whip Vanilla Frosting {Cream Cheese flavor if your store carries it, mine didn't}
  • 6 oz (half a tub) of whipped cream cheese (must be whipped)
  • Approx. 1/2 cup caramel sundae sauce {I forgot this at the store, so I perused Pinterest really quick and came
  • across this recipe. Luckily, I had all of the ingredients, so I mixed that up really quick.} 
  • Approx. 1 cup chopped pecans {sprinkle on as much or as little as you'd like}


  • Directions:
     
    1. Leave the cake in the dish it was baked in -- this is not a free standing cake. {Notice: I baked my cake in a smaller glass 9x13 dish and it ended up being too small and so I transferred it -after it was cool- to the larger red dish you see in the picture.}
    2. Poke approximately 20-25 holes {I just poked 'til my heart was content}, spread evenly, over the top of the cake with the bottom of wooden spoon.
    3. Pour the sweetened condensed milk over top, trying to fill the holes as much as possible.
    4. In a large bowl, use a hand mixer to beat together the cool whip, the cool whip frosting, and the whipped cream cheese until smooth. Spread over top of the cake.
    5. Pour the caramel sauce over top of the cake, and sprinkle with chopped pecans.
    6. Refrigerate for at least 4 hours, really overnight is best. {overnight is definately best}
    7. Cut into whatever size piece your tummy desires and enjoy!
     
     
    Linking up with Ms. Stephanie today:


    Wednesday, April 3, 2013

    yes, soup for you!

    For our 1 year anniversary of being a moved-in-together-and-paying-bills-together-grown-up couple, my Aunt and Uncle gave me & Nick a gift card to the Olive Garden. Our "anniversary" was the last day of 2012... and we just now used the gift card. oops.

    Nick & I hardly eat there. Like, we had only eaten there once together in the whole 3+ years we've been dating. But last Thursday, we decided to give it another shot {and to take my Dad along with us for the ride!}.

    There were a few disappointments:
    { 1- they told me I couldn't have the Peach Sangria because they were out of peaches... but when they brought my Berry Sangria, there were NO BERRIES to be found either. 2- they tried serving my Braised Beef & Tortelloni without any of the "demi-glaze" that is supposed to be on it. 3- the beef & tortelloni doesn't actually get a demi-glaze, it is supposed to be in a basil-marsala sauce. Not cool, OG. Not cool. }

    But the one thing that we all agreed on was that Dad's Chicken & Gnocchi soup was to.die.for.

    In fact, he scarfed down one bowl of that deliciousness and then asked our waitress to bring another {unlimited soup, people!}. We all shared the second bowl and our taste buds were in heaven.
    So good!

    Well, he liked it so much that he went back a second time that weekend with my sister, just for the soup!
    Enter that Sunday night when Dad and Jen were coming up to visit and have dinner. I told them I would make something with the spaghetti squash I had chillin' on the counter. Then, last minute, I changed my mind and decided I would surprise the Dadda with a homemade version of this yummy soup!

    Ta-da!
    Ps- that is a crescent roll in the top right corner. I only just realized how *odd* it looks
    now as I added it to this post. It's too late now to edit this picture again.
    We'll just have to deal with the strangely shaped
    baked goods... Moving on...

    This recipe was super simple. I borrowed the recipe from here, but then adapted to what I had in the house {and to our tastebuds}. Here's how you make it:

    Ingredients:
    • 3 boneless, skinless chicken breasts - cooked & diced
    • 4 Tbsp butter
    • 4 Tbsp olive oil
    • 1 quart half and half
    • 1 14 ounce can chicken broth
    • 1/2 cup celery, sliced
    • 1/4 cup flour
    • 2 garlic cloves, minced
    • 1 cup carrots, shredded
    • 1 medium onion, diced
    • 1 cup fresh spinach, coarsely chopped {I used a 10 oz package of chopped spinach}
    • 1 tsp dried thyme {or as much as your tastebuds desire.}
    • salt and pepper to taste
    • 16 ounce package gnocchi {I didn't use the gnocchi because I was in a time crunch and to be honest, I didn't miss it one bit! The soup was delish enough sans gnocchi.}

    Directions:
    - In a large stockpot, saute the onion, celery, carrots, and garlic in the butter and olive oil.
    - When the onion is clear, add the flour and form a roux.
    - Stir and cook a minute.
    - Add the half and half.
    - Meanwhile in another pan, cook the gnocchi. {Can obv. skip this step if you're skipping the gnocchi.}
    - Add the chicken to the stockpot.
    - Stir often and when it gets thicker, add the chicken broth, gnocchi, spinach and seasonings.
    - Cover and heat through.
    *it may take a while for the soup to get thicker after adding the broth. trust me, it's worth the wait!*
    - Eat straight from the stockpot with spoon  Enjoy!


    Thursday, March 21, 2013

    Saw It, Pinned It, Did it: Bubble Up Pizza!

    This past Saturday was one of those days where I had to work for the better part of the afternoon/evening after a semi-stressful morning and I was just not feeling it... nope, not.at.all. Granted, I do love my part-time job {well, I love my full-time job too, but that's a moo (yes, moo) point} but sometimes it would be really nice to have the weekends off.

    Anyways, I was just so tired after my shift at the Pier and then... well, then I had to book it right on over to Wallyworld to meet Nick & babygirl for grocery shopping. (OH JOY, GROCERY SHOPPING! not.) Our poor fridge was so empty that morning though, it wasn't even funny. So, this trip was needed for sure, but grocery shopping is just never on my "Oh yeah, can't wait to do that!" list. Plus, I was huuuungry!

    Isn't that a cardinal rule, to not go grocery shopping while hungry?? {unless you want to take the whole store's inventory home with you of course?} Well, I. Broke. That. Rule... yikes. Luckily, I was not alone in my shopping venture, otherwise I don't think I could have been held responsible for the grocery hull that would have been...

    The trip was long, yet the grocery list was short. It's amazing that, no matter what our list says, we always end up with things we didn't expect to get. Luckily, earlier that day I wrote down some ingredients for recipes that I had pinned. One of which being....

    Bubble Up Pizza  
    click HERE for original recipe link
     
     
    After our long grocery store trip {and my seemingly long shift at work} this quick and easy recipe was just what our night needed! It was so simple and super yummy!
     
    Here's what you'll need:
    cooking spray // 2 (12 oz) cans golden layer buttermilk biscuits // 1 (15 oz) jar of pizza sauce
    2 cups shredded mozzarella cheese // your favorite pizza toppings
     
     **Now, I cut my recipe in half. Peyton had already eaten dinner that night, so it was just me & Nick who would be responsible for consuming whatever was created. We hardly ever eat our leftovers (seriously, they get shoved to the back of the fridge and don't return for a very long time). So, I only used about half of one of the jars of pizza sauce (should have used the whole jar), 1 of the cans of biscuits... but plenty of cheese.**
     

    Directions:

  • Preheat your oven to 375* and grease a 9x13 baking dish, then set aside
  • Next, try not to pass out from being scared to death by the biscuit can...

  • Seriously, it gets me every time. Can't they create a much less scary way to package these?!

    • Cut your biscuits into smaller chunks (I did about 6 chunks per biscuit).
    • Put your biscuit pieces into a bowl along with your pizza sauce.
    • You (or your little helper) can then stir the contents of the bowl to get the biscuits all nice and coated with the pizza sauce.
     
    • Next, add 1 cup of the mozzarella to the bowl and stir everything again.
    She really is the best little helper! :)

     
    ** Here is where I would suggest adding some of your pizza toppings to your mixture**
    (I forgot to get pepperoni at the store... it wasn't on the list and it wasn't in my line of sight, therefore they weren't even remotely on my radar.)
     
    • Once everything is all mixed together, scoop/pour/move the mixture evenly to your pre-greased baking dish!
    • Lastly, top with the remaining Mozzarella cheese (and maybe a few more handfuls, for good measure) and whatever toppings your heart stomach desires.
     
    • Pop it in the oven and bake for 30 minutes!
    • Enjoy!
    •  

      Thoughts:
      - Make sure you check on it throughout the cooking time so you don't overcook it otherwise it could get a little rubbery.
      -This is a great recipe to make with your children, because they can help stir and scoop 'til their little hearts are content.
      -You can add whatever ingredients you would like... maybe next time I'll try to make a Hawaiian pizza inspired one!
      -If you're going to make the full recipe (with both cans of biscuits) I would suggest using a fairly deep baking dish.
      -This recipe was so simple and easy to make, especially after a long & exhausting day.


      Linking up today with the beautiful Katie & Stephanie: